Quite often considered to be too difficult, and needing the most expensive equipment to get it right, not to mention the cat like reflexes needed. Bird photography intimidates a lot of photographers! It’s really quite easy, if you follow a few very basic tips. During this lockdown period, I have had the opportunity to get out and focus on some of the smaller things and I thought I’d share some of the fundamentals I’ve learned from some much wiser photographers I’ve had the pleasure of learning from.
The Camera set-up
- I always start on Aperture priority, with my aperture as open as possible. In my case f4, but for many lenses it would be f5.6. I always start as open as possible, because most birds won’t let you get that close and they are quite small, but also allowing me to get a lot of light onto the sensor, therefore prioritizing the fastest possible shutter speed.
- White balance can be set to auto, but I like to set mine to about 5200 kelvin.
- Vibration resistance must be off. It’s only really handy when the shutter speed is slower that the focal length of the lens. The rule of thumb is that there must be a 1:1 ratio of shutter speed to focal length for example 400mm would need a shutter speed of 1/400sec not to have a shake blur. When shooting birds the shutter speeds are generally 1/1000sec or higher. The Vibration resistance slows the focus down, so by turning the VR off, you’ll get more images in focus, as you’ll be able to track better.
- Focus should be set on the continuous focus setting. AF-C on a Nikon or Al Servo on a Canon.
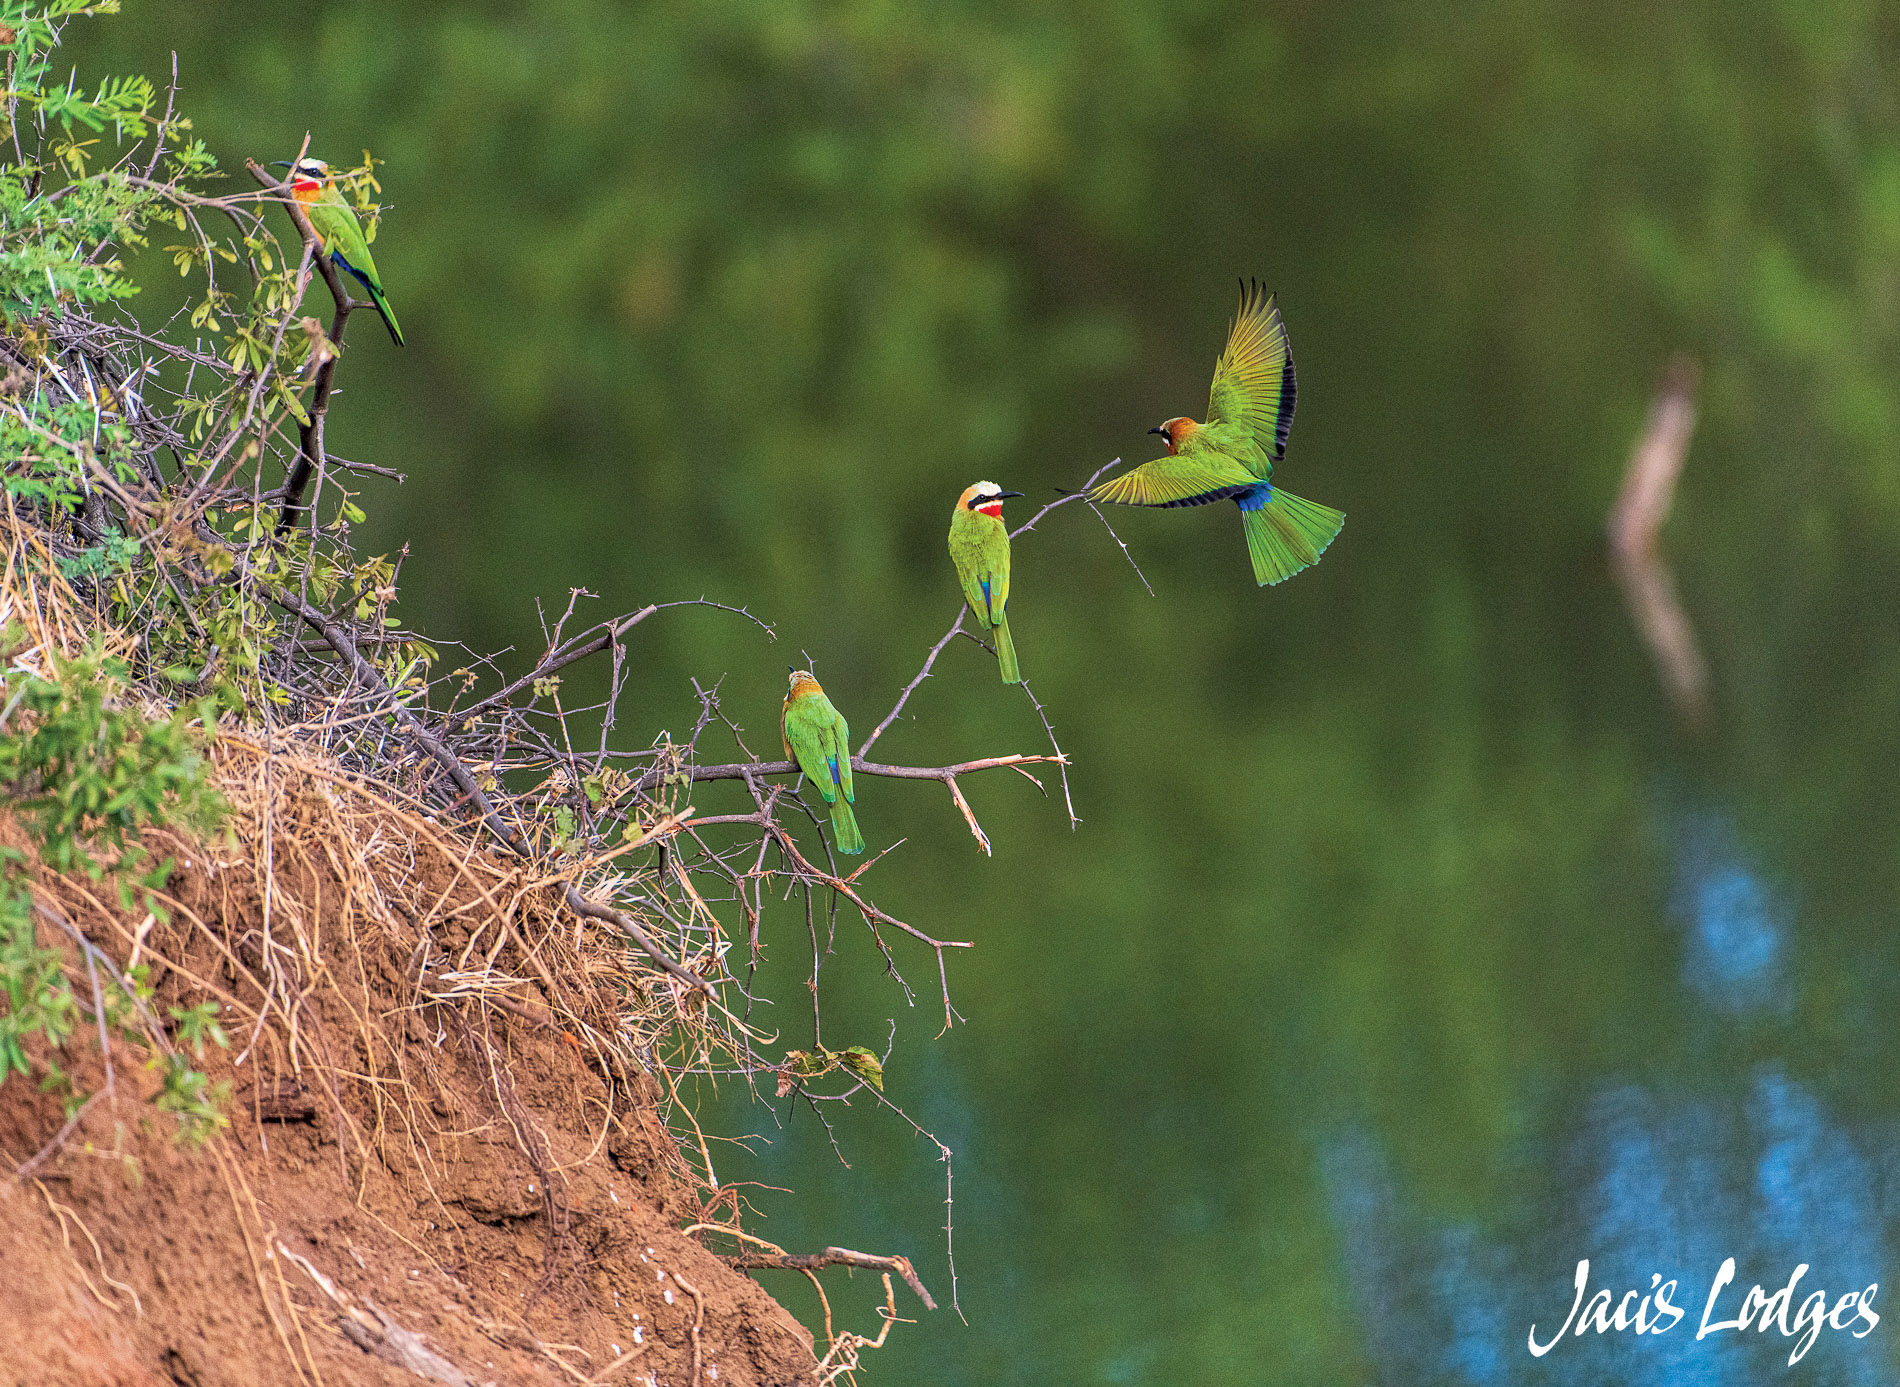
White-fronted Bee-eater, 1/4000sec, f4, ISO 1600
What bird are you photographing?
I tend to work with a very simple system. It all depend on the size of the bird, which will dictate how fast it beats its wings.
Large birds: You can freeze the action at about 1/1000sec
Medium sized birds at about 1/2000sec
Small birds at about 1/3000sec or higher.
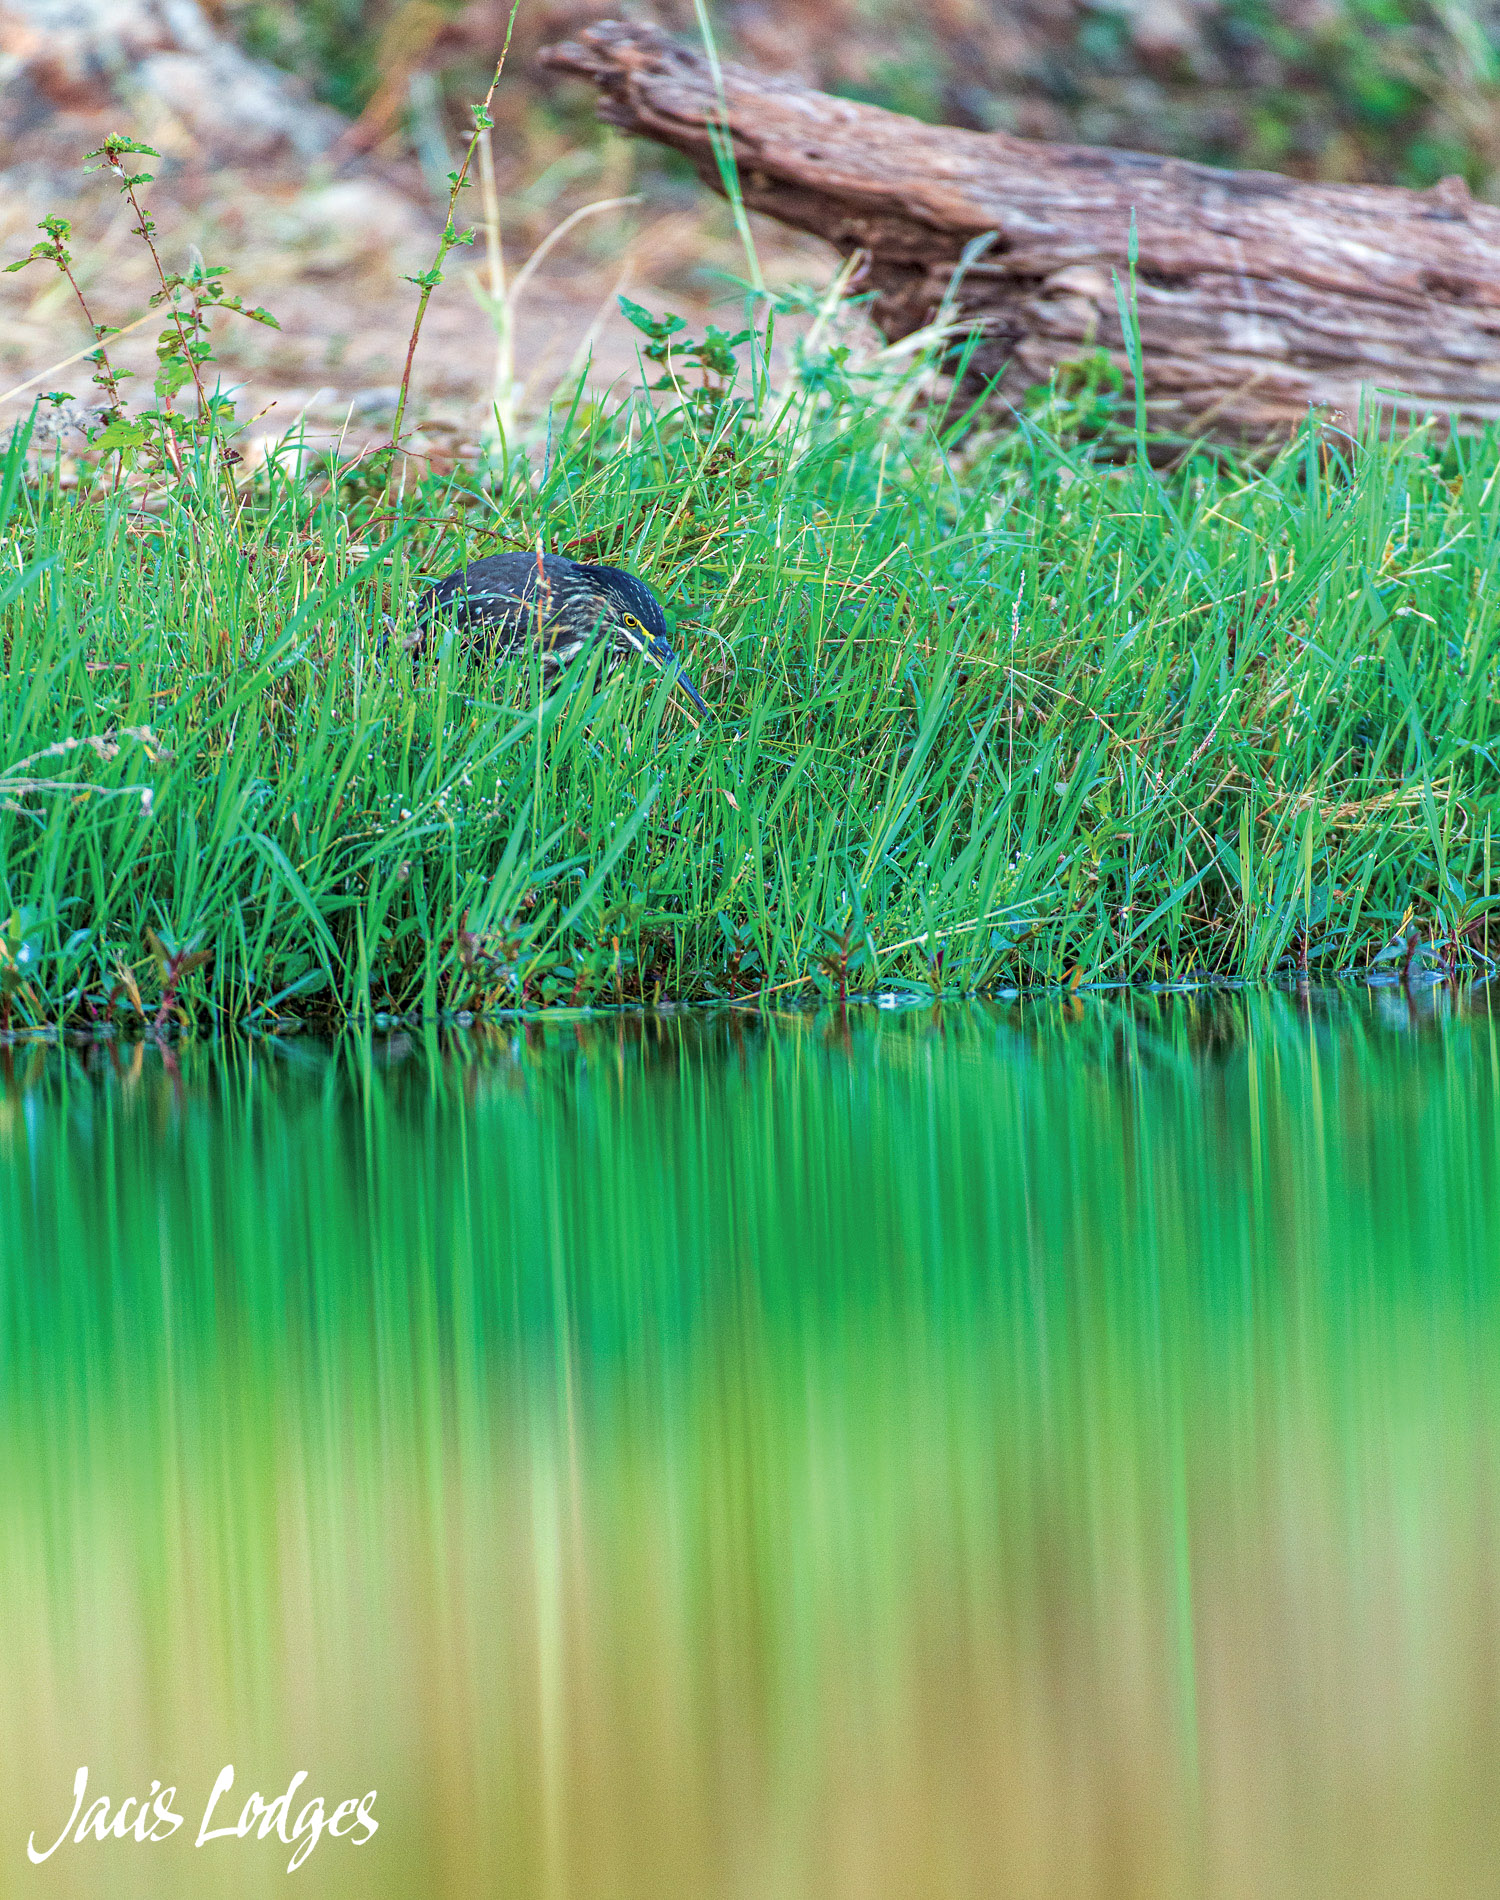
Juvenile Green-backed Heron 1/320sec, f4, ISO 500
I will always keep it at the intended shutter speed for flight, because let’s face it, Birds fly! And you want to be ready for that moment. I noticed that the shutter speed was low, and adjusted the ISO to 800 to get to the 1/1000sec shutter speed. In anticipation of the flight. When it took flight, it flew into sunlight and I ended up with a shutter speed of 1/8000sec. Maybe overkill, but I got the shot.
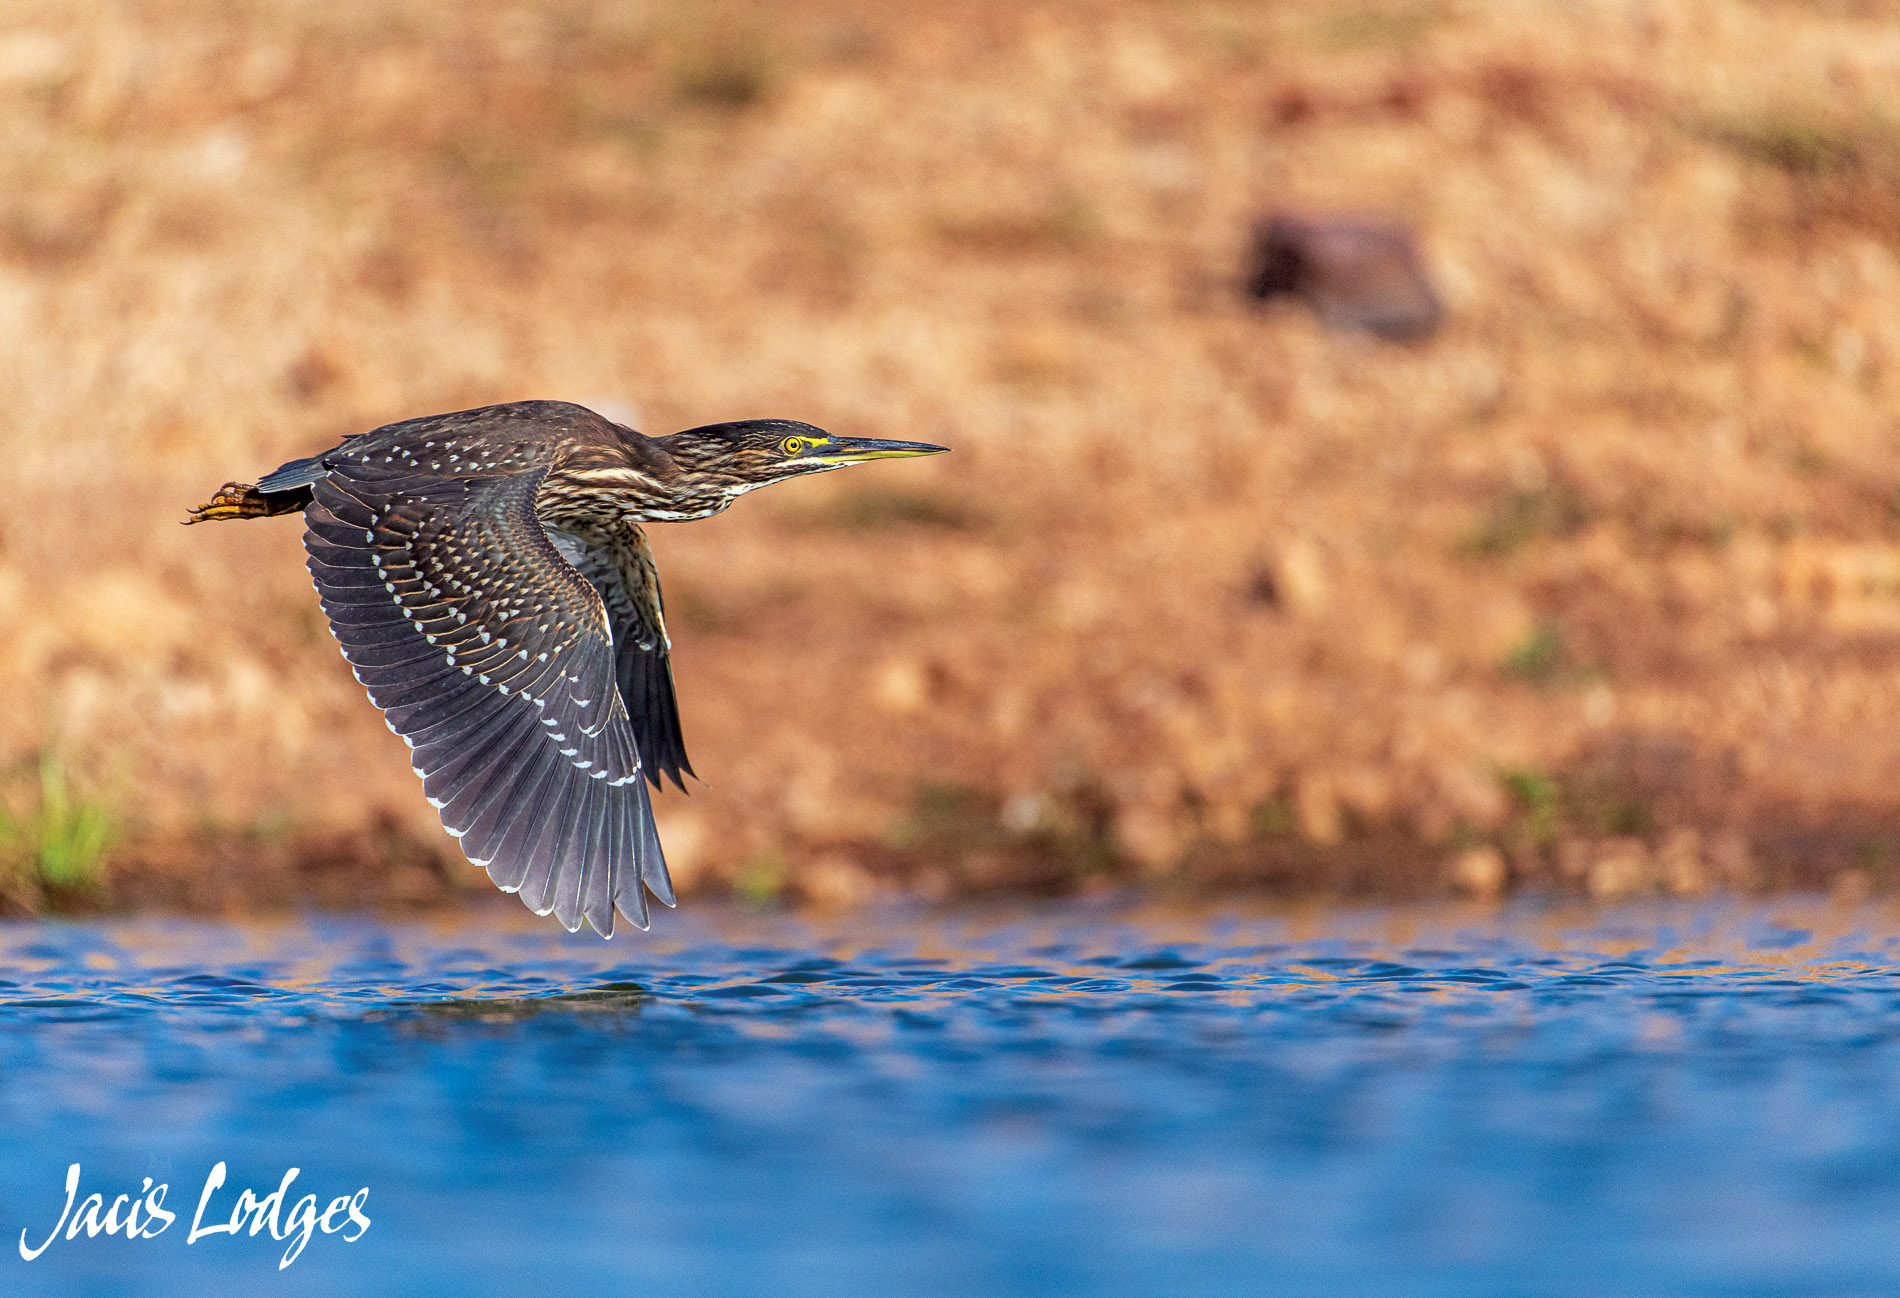
Green backed Heron, 1/8000sec, f4, ISO 800
Regarding the ISO, rather have a high ISO that will allow you to get the desired shutter speed. Sacrifice a little, but get the shot rather than no shot at all.
Here are some of the bird images I’ve managed to get over the last few weeks, by using these basic fundamentals. Drop me a comment on Facebook or Instagram and let me know which one is your favorite.
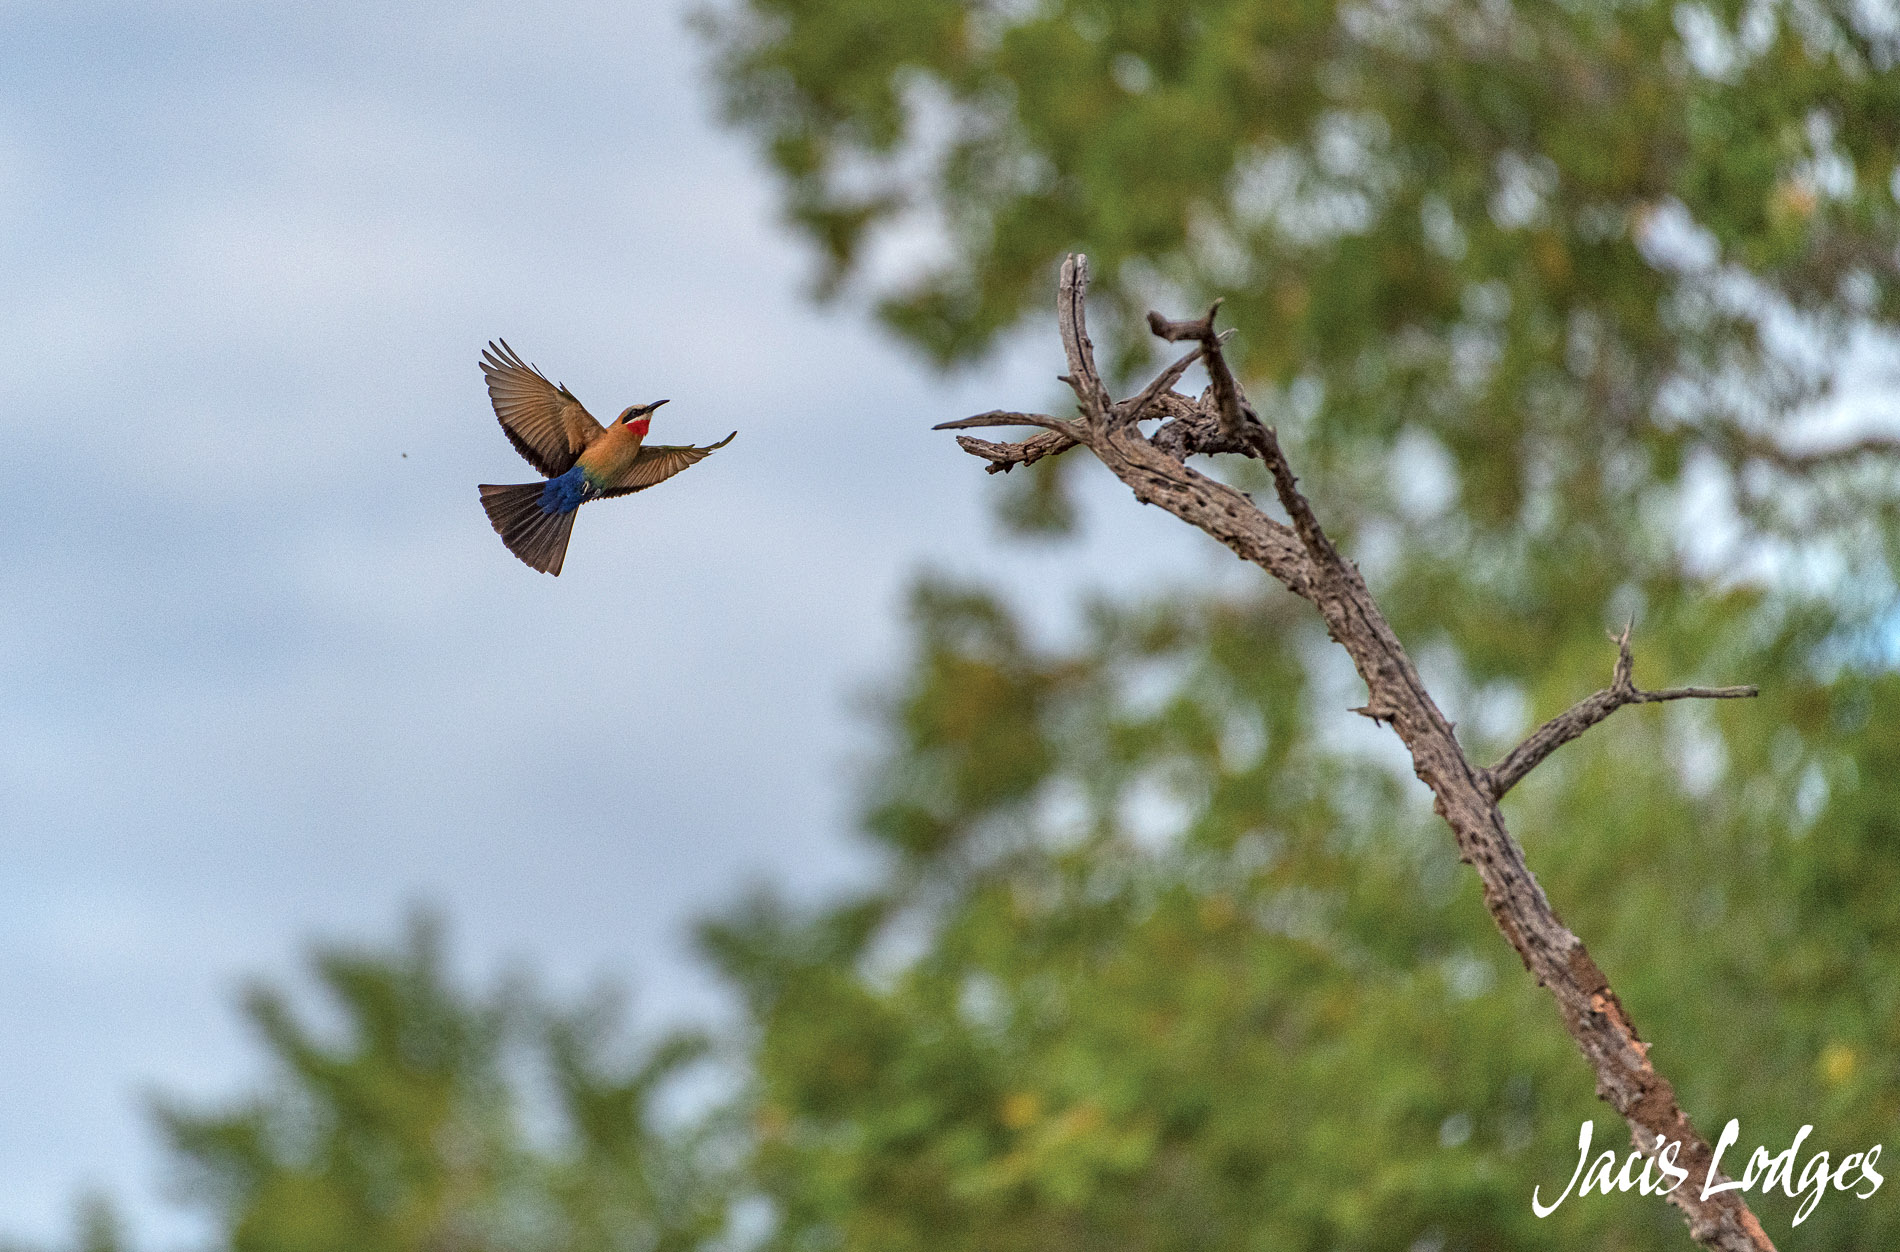
White-fronted Bee-eater, 1/8000sec, f4, ISO1000
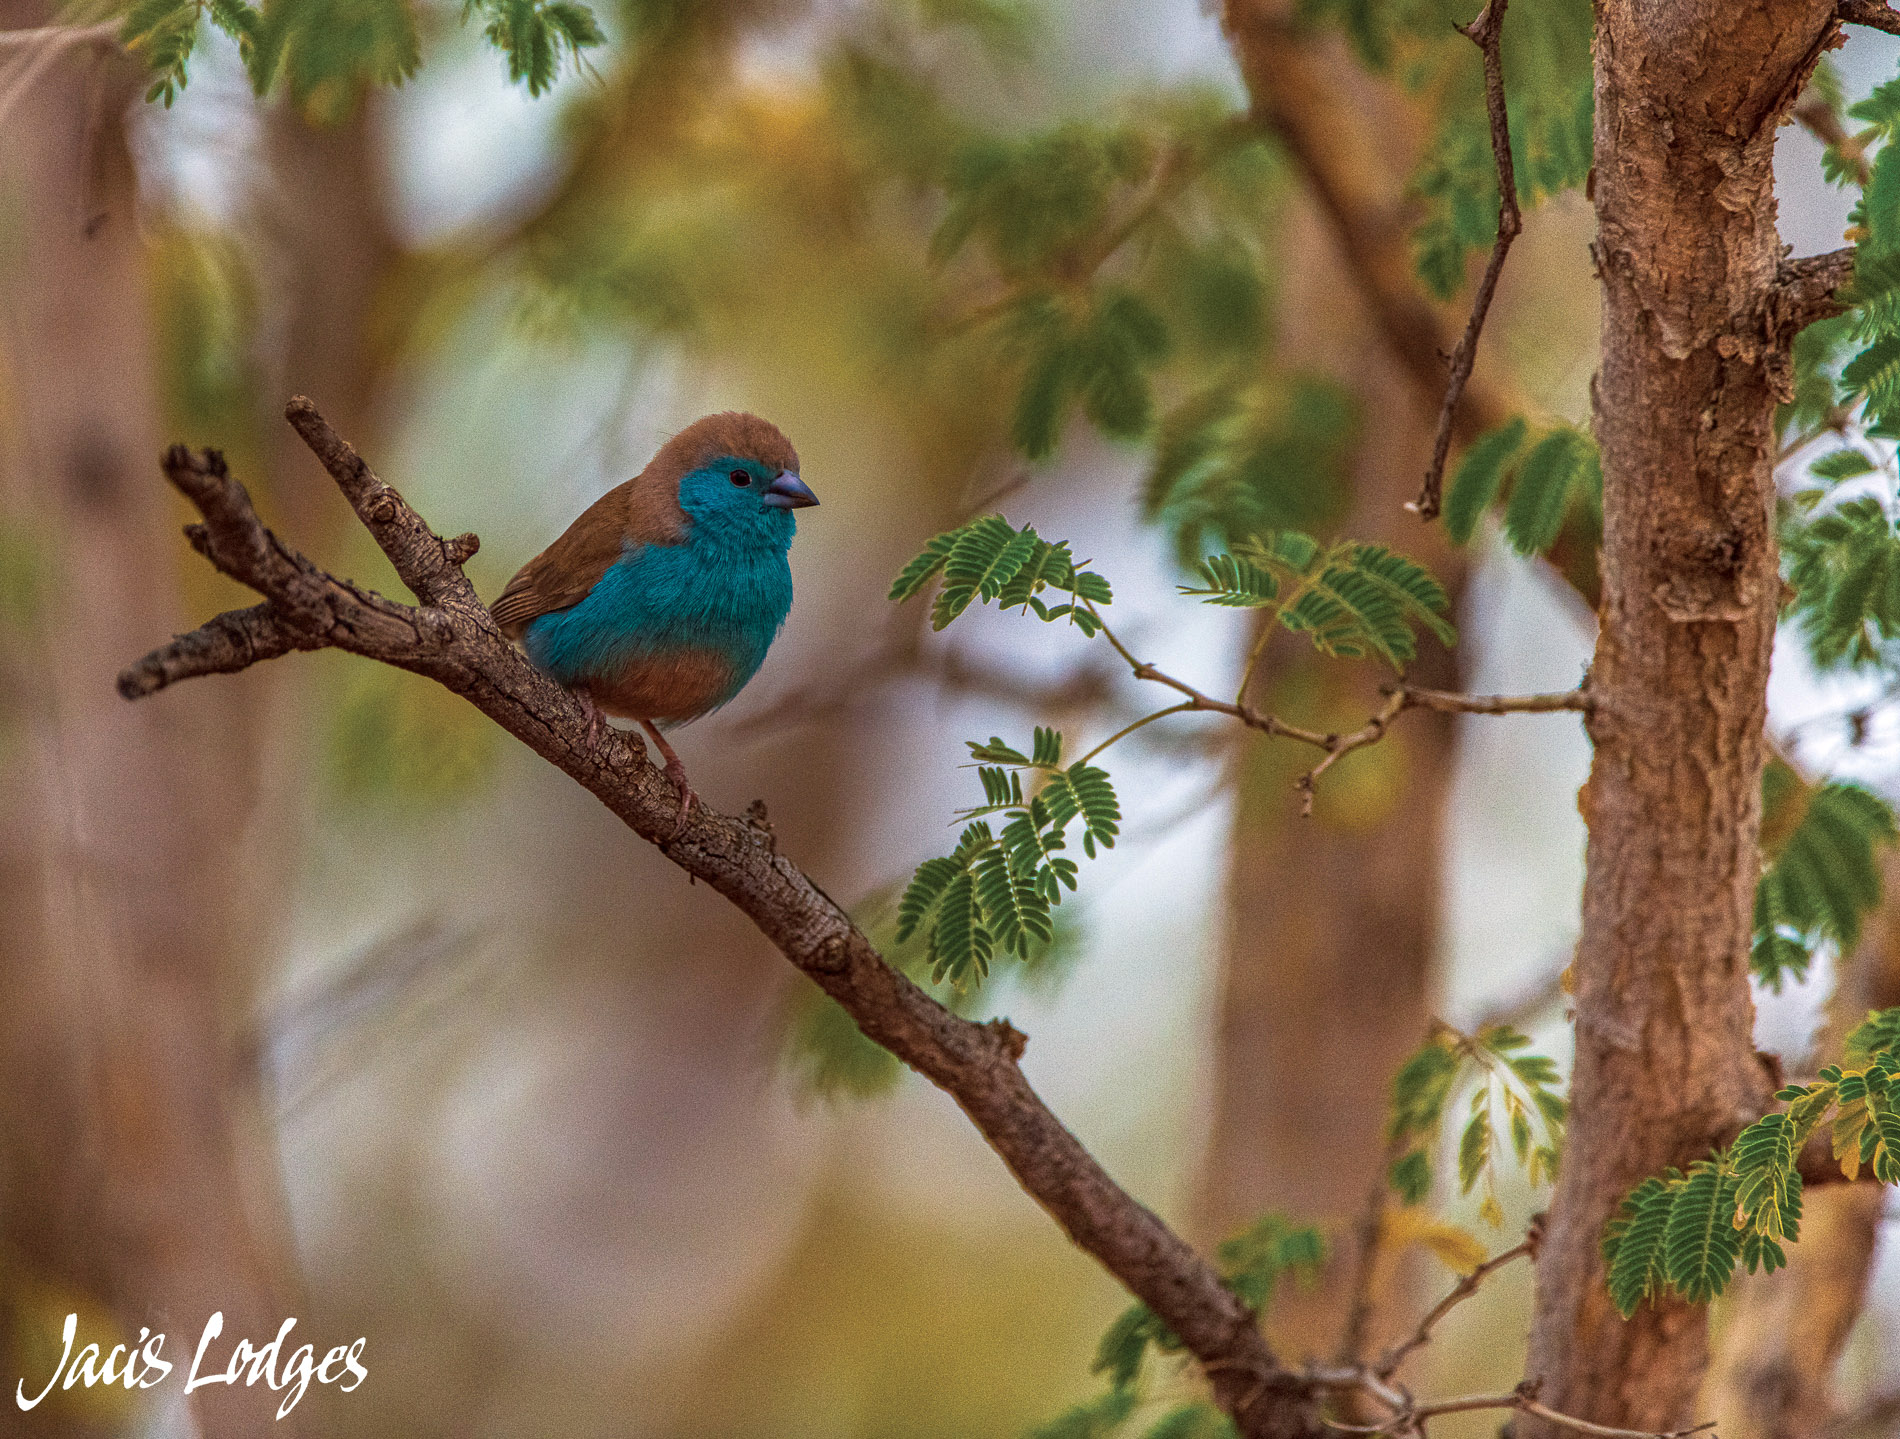
Blue Waxbill, 1/1250sec, f4, ISO 1250
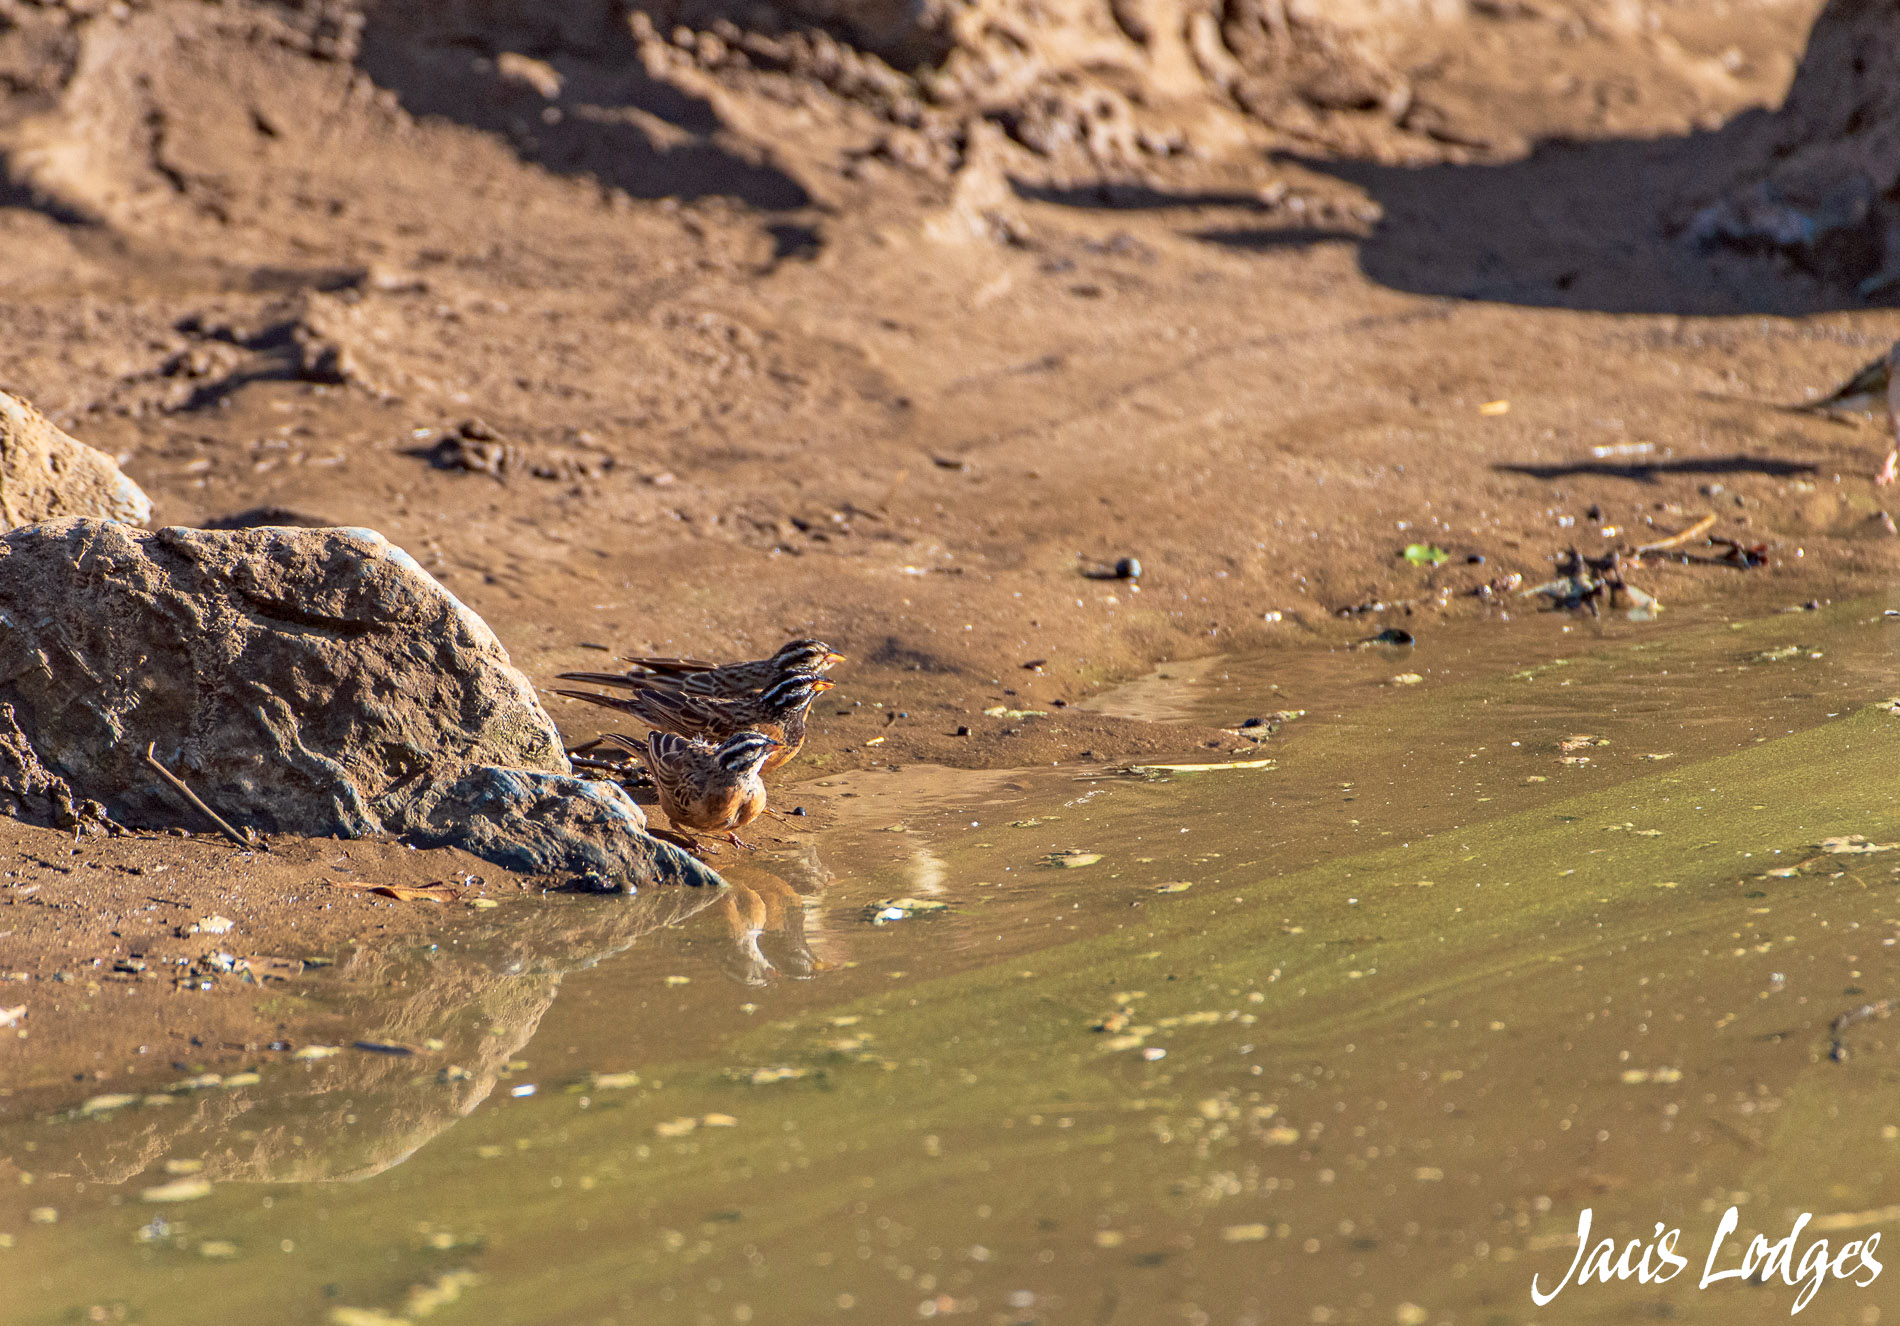
Cinnamon breasted Bunting, 1/1250 sec, f4, ISO 400
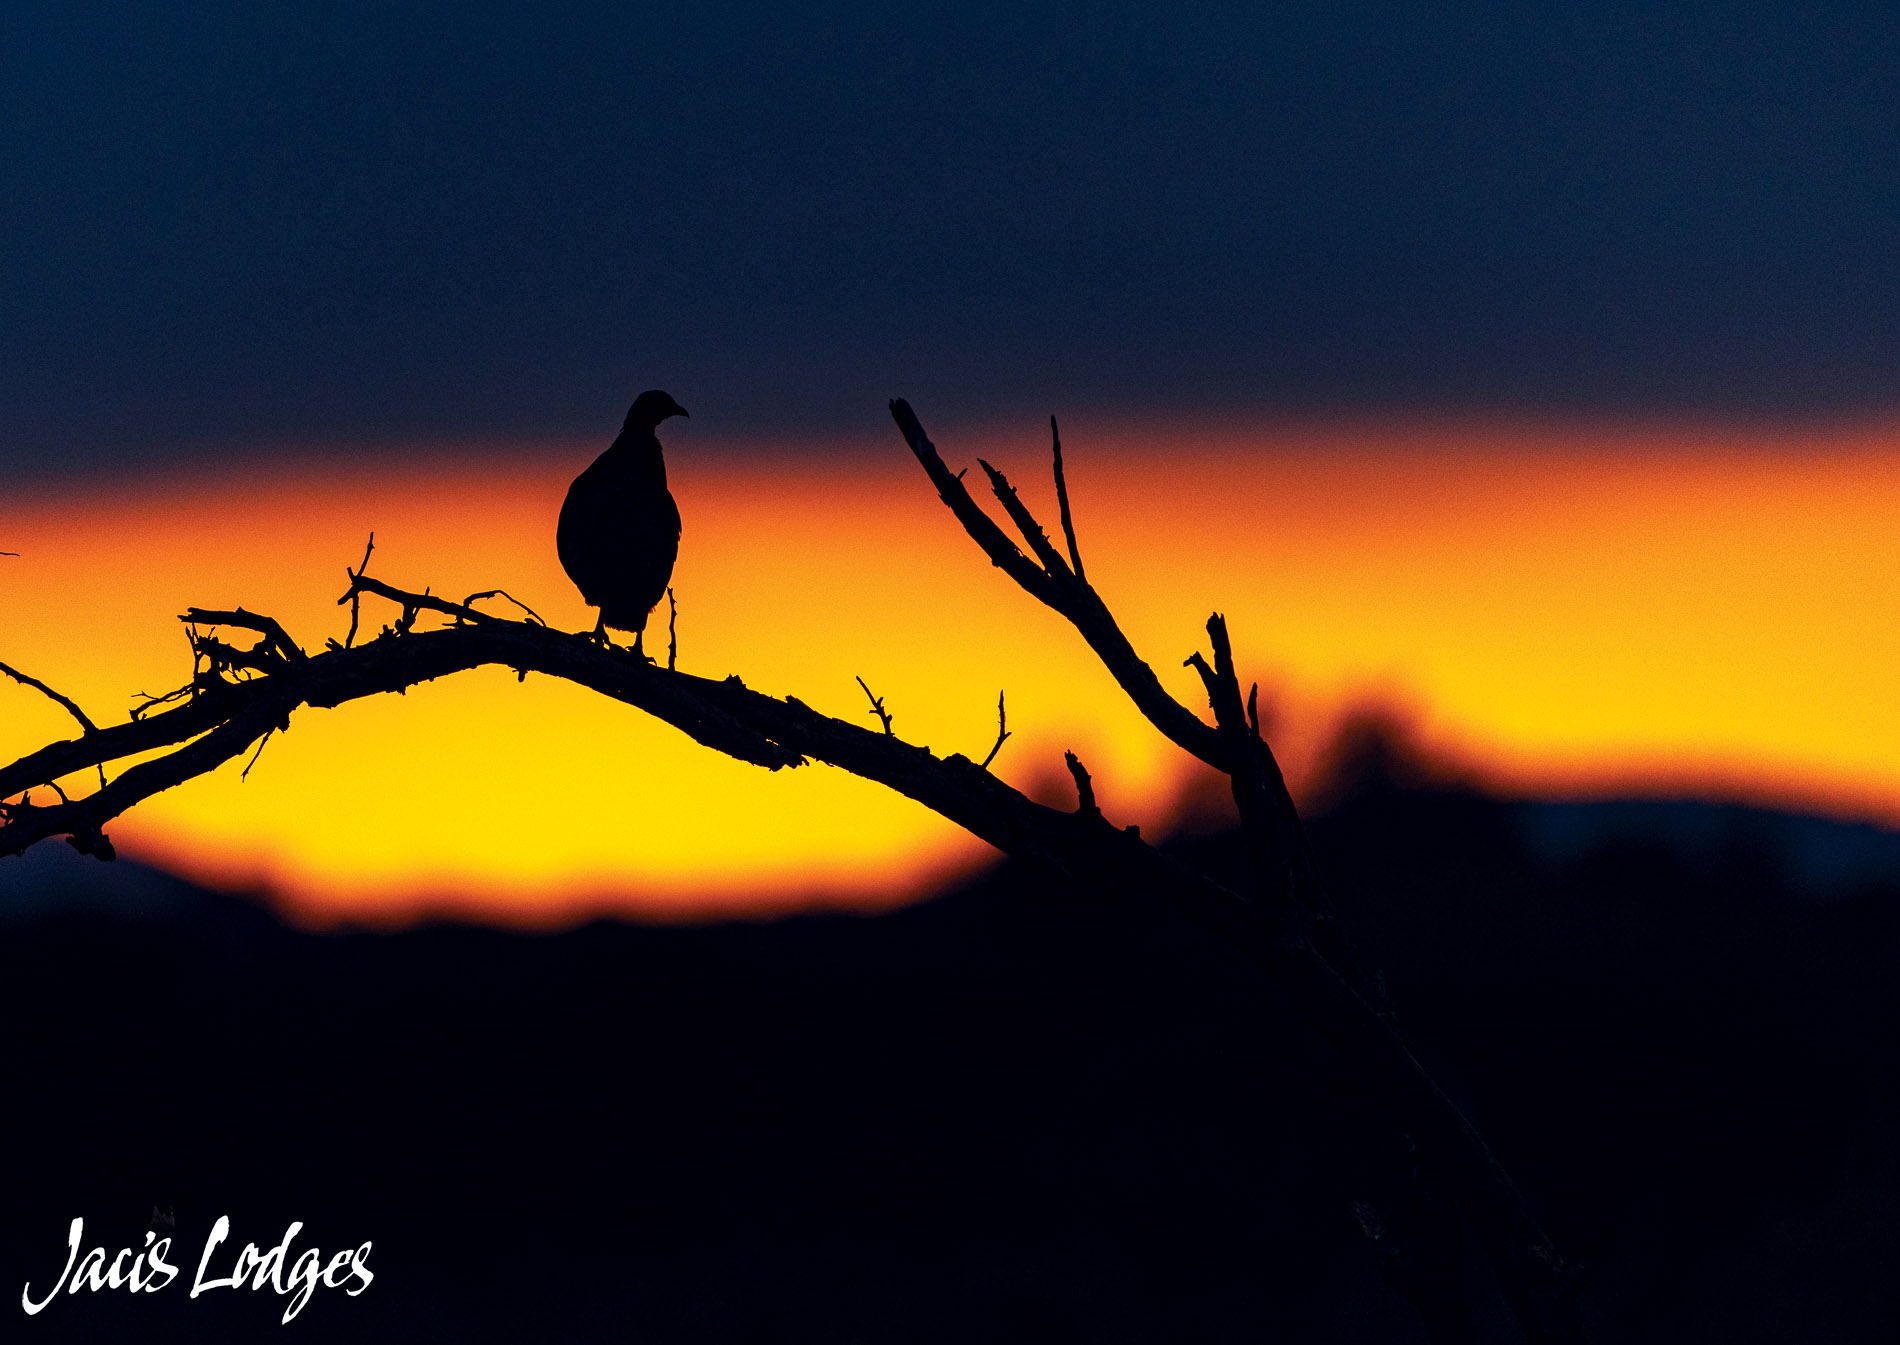
Swainson’s Spurfowl,1/2000sec, f4, ISO 640
I’ll post another blog in the next week, and discuss the planning and behavioral side of bird photography.
I do hope that you’ve enjoyed the blog
Darren Donovan